Tunnel of Power for Nordic Skate Skiing
/
The Tunnel of Power
Every skate skier I’ve ever taught says the same thing: “I want to be more efficient.”
“No problem,” I say, “just ski in the ‘Tunnel of Power.’”
Where is the Tunnel of Power? The answer is that it’s everywhere you ski. Therefore, finding the tunnel is pretty easy: you just have to know what you’re looking for. The following directions will help you find the tunnel and improve your skate skiing.
ENTERING THE TUNNEL
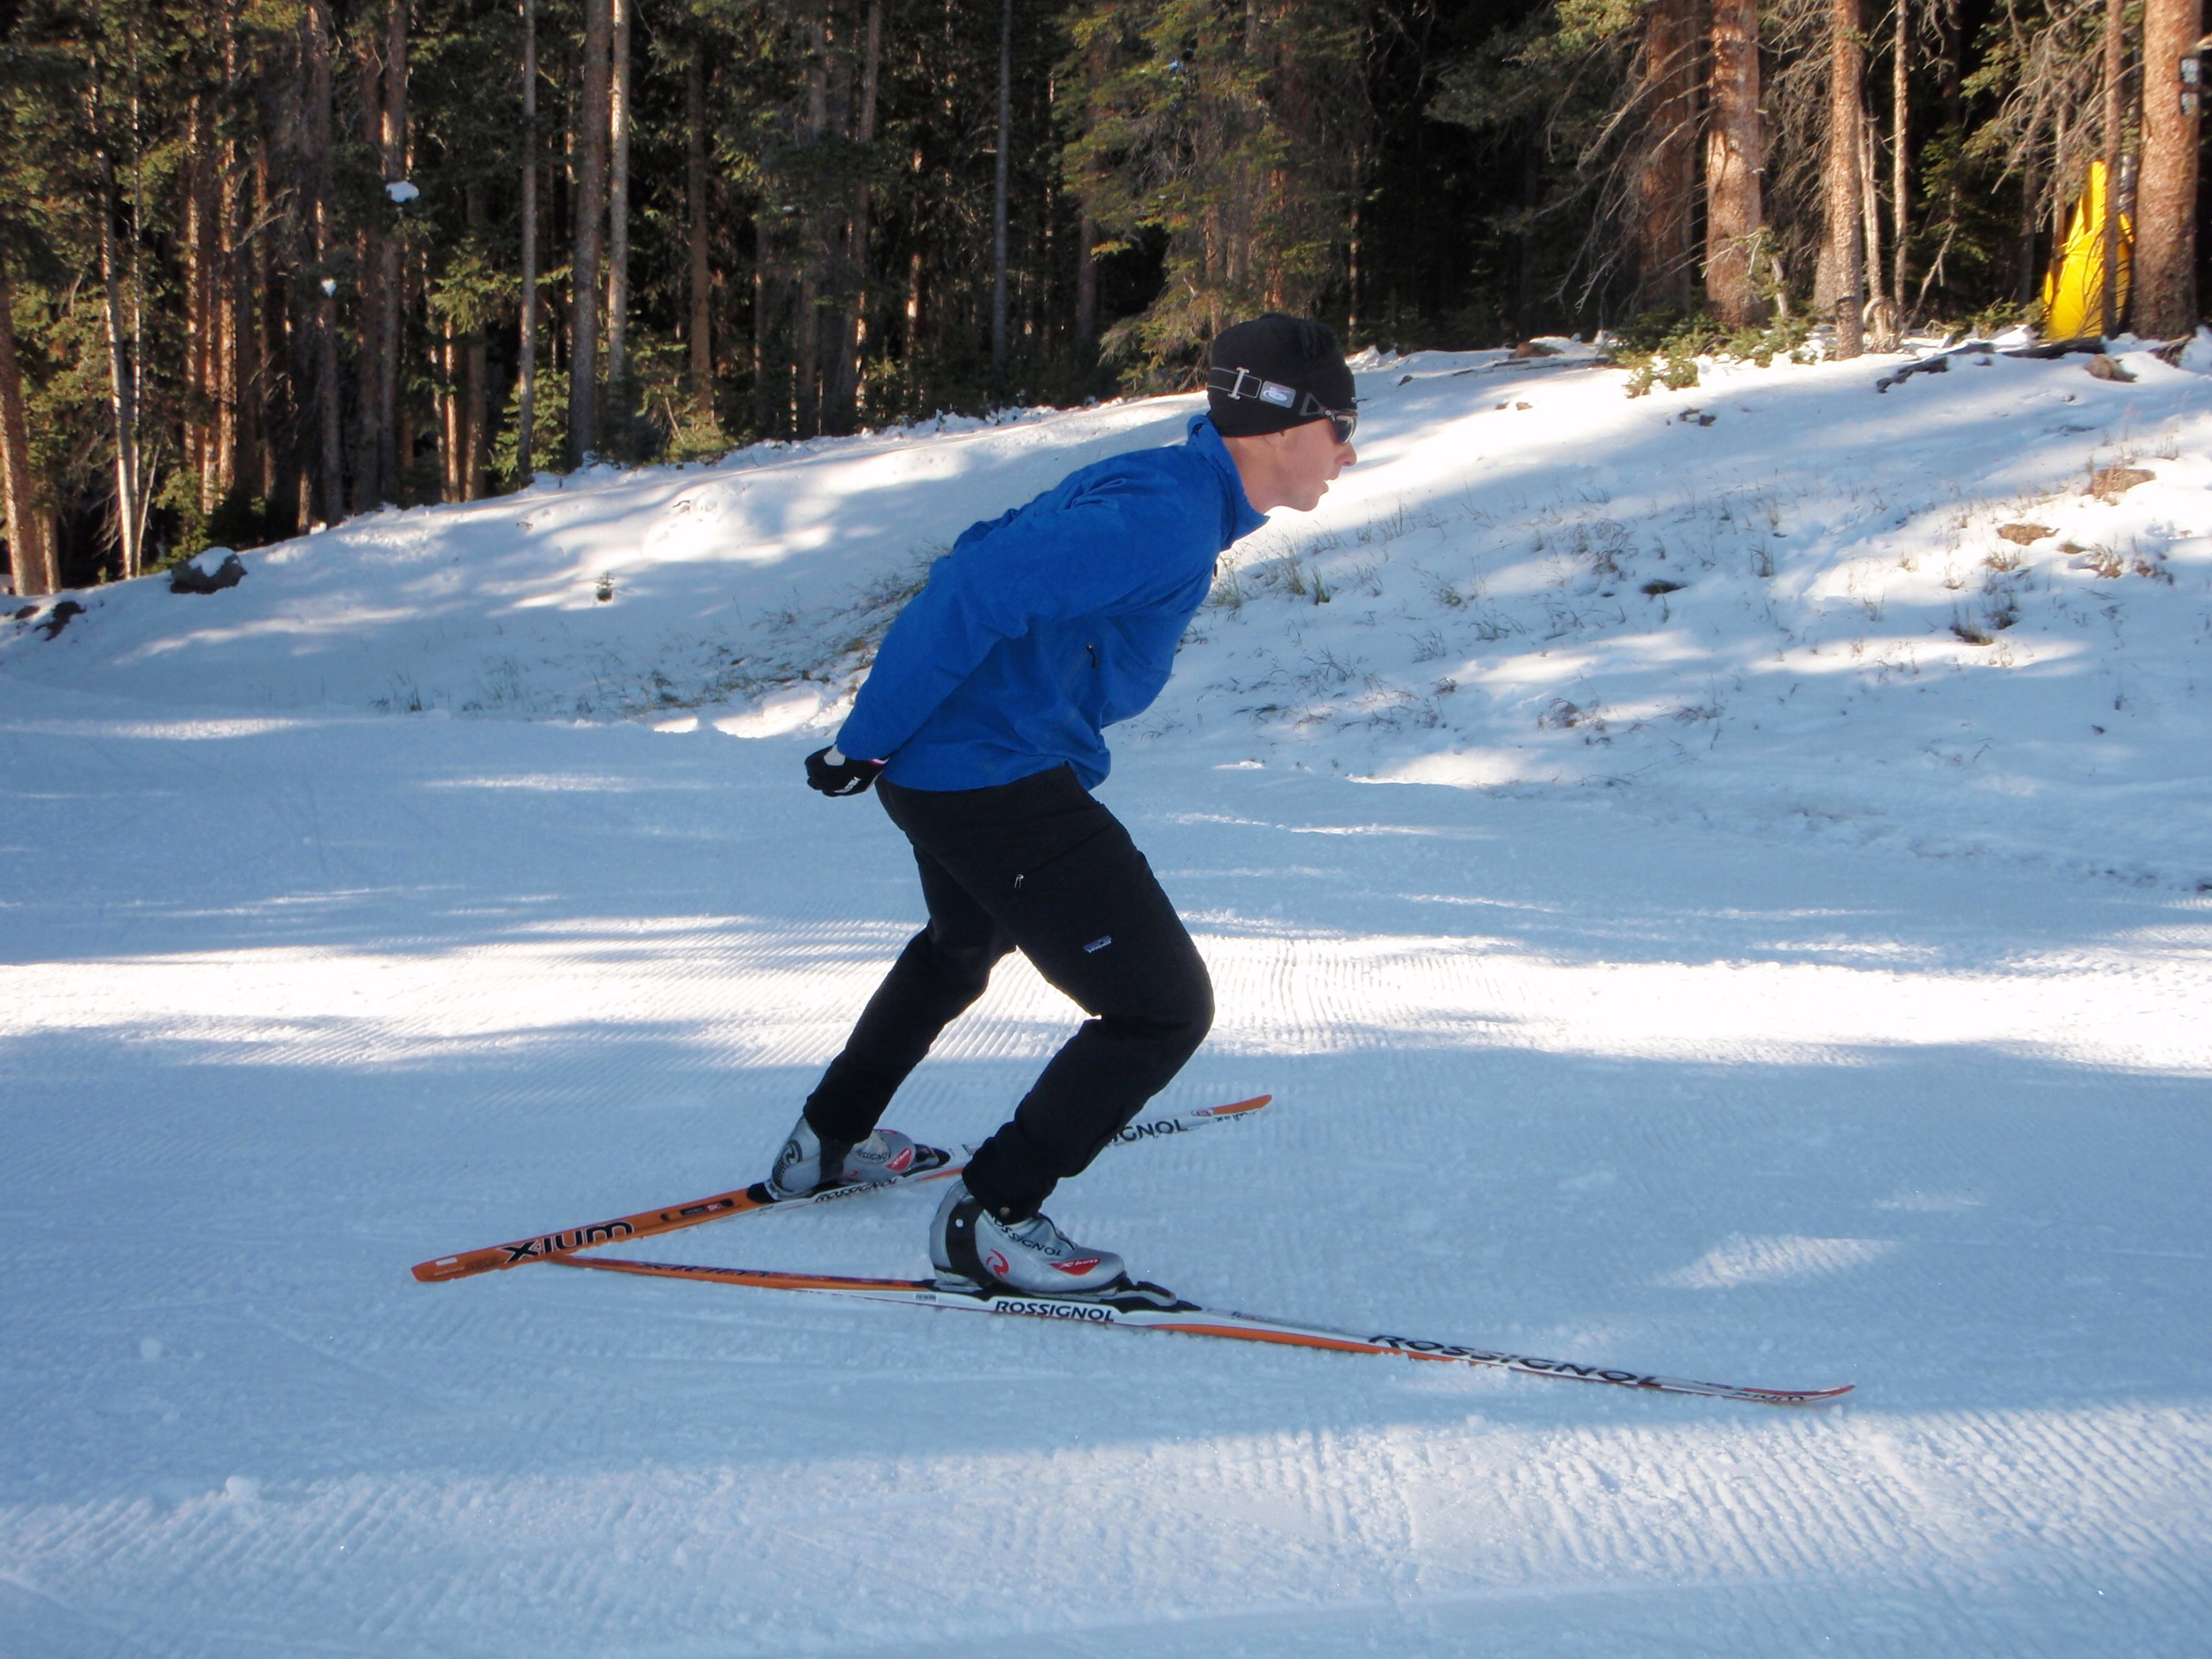
Stand in the middle of a trail (on skis but without poles) and imagine you’re inside a tunnel that’s not quite tall enough to allow

you to stand upright. That is, if you stood with your legs straight, your head would hit the tunnel’s ceiling. To avoid a headache bend your knees and relax your upper body to an angle that allows you to fit into the tunnel. Don’t bend over like you’re trying to pick something up, but instead look down the tunnel, bend your knees, and flex your ankles so that you don’t hit your head. Now start skiing.
THE WIDE ANGLE
Great, you’re smoothly skiing through a tunnel that’s a bit too short to stand up in. Now, if I ask you to straighten a leg without standing up straight, what would you do? In this situation the proper way to straighten your leg would be to extend it to the side while the leg you are balancing on remains bent. Now bring the straightened leg back under you to its original bent position, and extend the opposite leg toward the “side” of the tunnel. While each leg extends to the side your upper body should remain on the same level plane, with your head just a few inches below the ceiling of the imaginary tunnel. This time when you ski in the tunnel, try to touch each side with the tip of your ski by extending your leg. Throughout this exercise just make sure that you remember to avoid hitting your head on the ceiling! So now you’re skiing inside the Tunnel of Power, really driving each ski out to the sides of the tunnel.
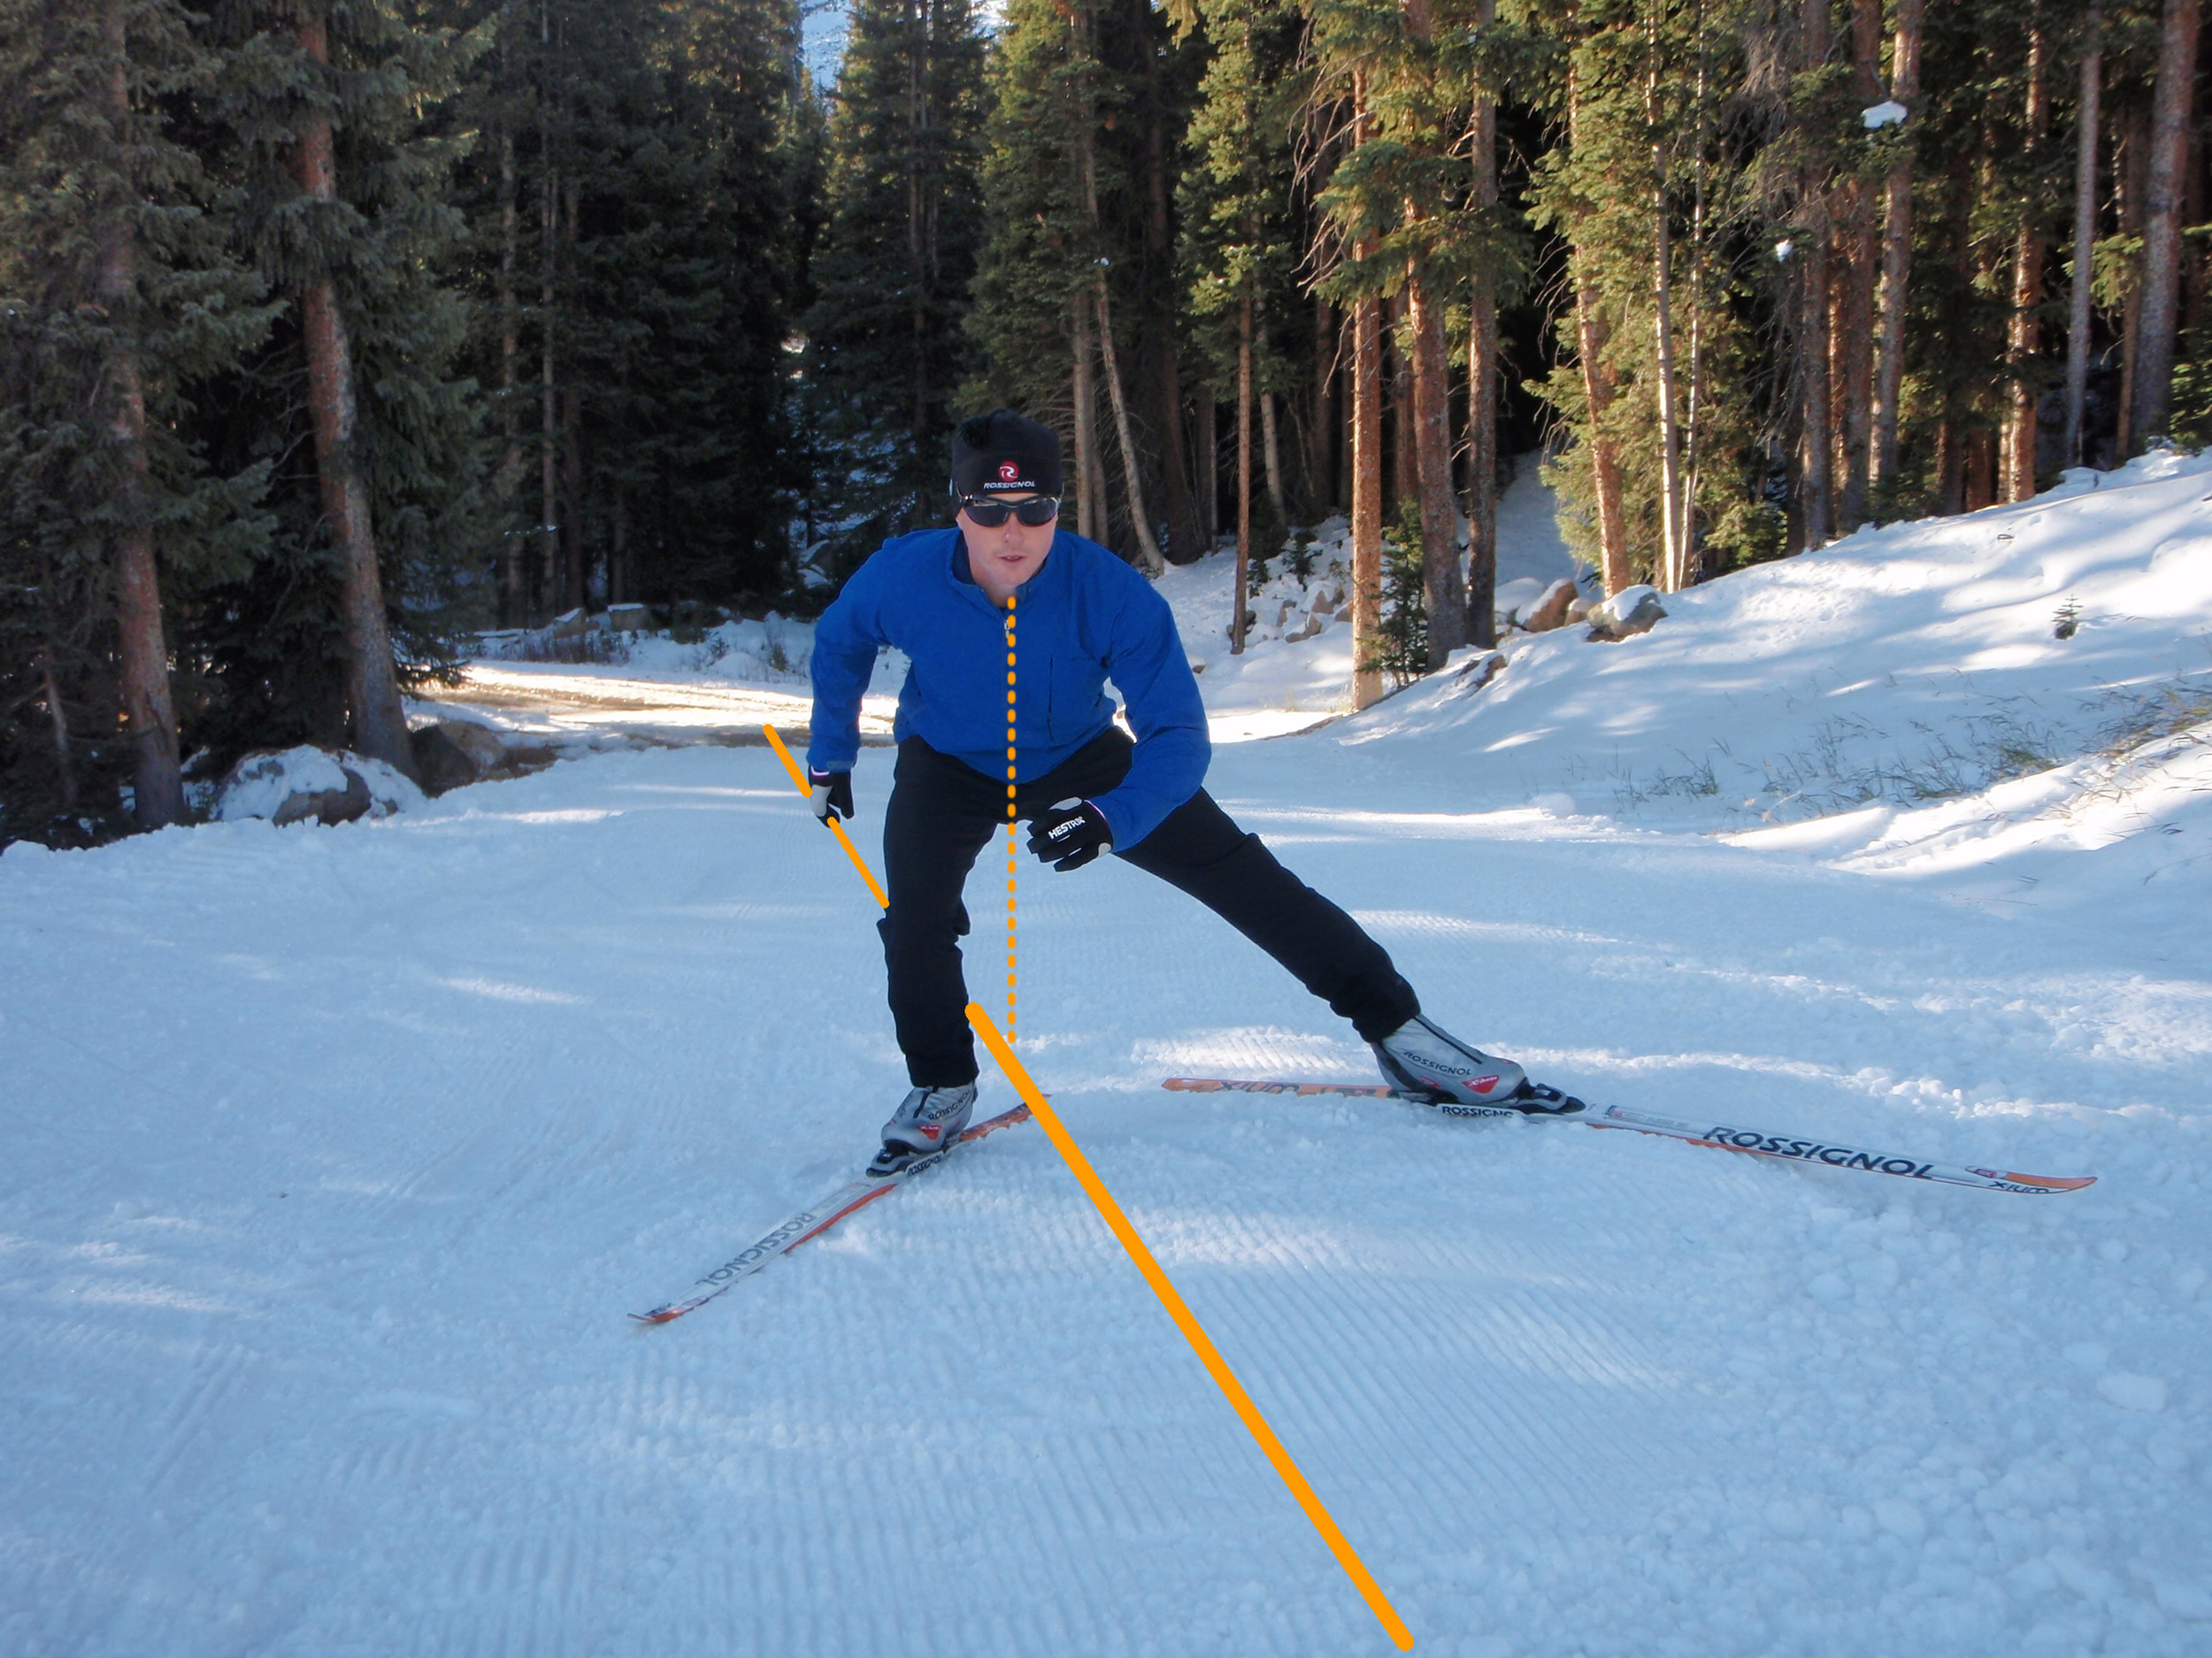
THE BELLY BUTTON LINE
After you’ve practiced skiing within the tunnel, the next step is to bring more power into your movement. To do this you’ll want to bring your non-gliding ski farther in, directly beneath your upper body—so far beneath that if you drew a line directly down from your belly button, it would descend directly to the toe of your boot. This line is directly below your belly button; step on the line and “drive” your ski all the way to the side of the tunnel. And if you’re driving and gliding longer over each ski, then you are taking fewer steps to cover the same amount of ground as you did before.
Inside the Tunnel of Power, you are more efficient and more forceful without using up extra energy.
Remember to:
1) keep your head just a few inches below the tunnel’s ceiling;
2) extend your former glide ski all the way to the side of the tunnel, trying to touch the side with the tip of your ski; and
3) step on your belly button line.
For optimum performance within the tunnel, blend these three movement patterns together for better performance.
ONE LAST THING
Finally, for optimal efficiency within the tunnel you’ll want to slow your rate of turnover. In other words, slow down the tempo of your kick-and-glide [glide ski]. See if you can touch the side of the tunnel by slowly extending your leg rather that quickly extending your leg and retracting it. As many skiers can attest, you can fake proper movement just by skiing fast. (You’re the only one who can tell.) But the true test is slowing it down.
Have fun, and I’ll see you in the tunnel!
by David Lawrence XCSkiAcademy.com